
 | |||||
 | |||||
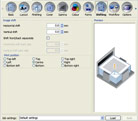 The print direction rotation, position adjustment and data enlargement/shrinking to match the paper size can all be set from the printer driver. The print direction rotation, position adjustment and data enlargement/shrinking to match the paper size can all be set from the printer driver. |
 |
| This function allows multi-up (single-page) printing by reducing the size of the original and printing multiple copies on one sheet of paper, as well as allowing multi-up (multi-page) printing by printing multiple pages on one sheet of paper. This function allows you to reduce the number of printed pages to conserve paper, and is useful in compactly combining bulky documents into an easy-to-read format. |
 |
| Create a double-sided two-page paginated spread without using an application. This function lets you print multiple-page documents such as booklets and pamphlets. |
 |
| The printer collate function is divided into "Sort" and "Group". Use "Sort" to print the required number of copies in page order. Use "Group" to print the required number of copies for each page. Select one or the other depending on the printed material being created. Paginated items are normally set to print as collated. This function allows conference materials etc. to be quickly prepared. |
 |
| A separator page can be inserted to separate each job, or for every division of collated copies and page units. A previously prepared cover sheet can also be inserted. This function allows you to easily complete the normally tiresome task of job separation. * When you use the job separation function, you cannot print onto the separator or cover sheets. |
 |
| This function allows you to proof a copy prior to printing multiple copies. It lets you proof the layout, binding margin, finisher settings prior to printing the entire job, and can eliminate paper waste due to improper settings. |
| You can economically print business documents containing mainly text by selecting the "Line-based" mode. You can also print sharp copies of flyers that incorporate images and graphics by selecting "Photo-based" mode. Use the mode that is appropriate to the original being copied. |
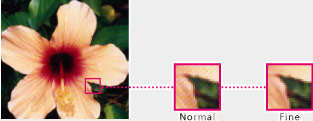 |
| Create crisp images by selecting the "Fine" print setting. You can also modify the finished image by manually selecting the ink's maximum drop number. |
| The contrast, lightness and saturation of the original image can be adjusted. This is a useful function for reproducing clear images and images that better match the original. * Only available on the HC3R-5000. |
| The printer does halftone processing of images (screening) in two ways: "error diffusion" and "dot screen" processing. In "error diffusion", gradation is achieved through differing dot densities. In "dot screen", gradation is achieved by modifying the dot size. Achieve beautiful print results by using the processing method that best fits the image being printed. For example, use error diffusion for full colour images and dot screen processing for black and white images or images with few colours. |
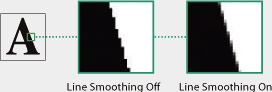 |
| If text or illustration contours appear jagged, use the line smoothing process to correct the problem and create a smooth look. * Use of the line smoothing function will decrease printer speed. |
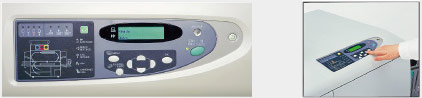 |
| An operation panel is built into the printer body. This allows the user to execute operations from both a PC's printer driver as well as from the printer itself. Once the print position and density have been adjusted with the main operation panel, a test print can be output to check the print job. |
| When the save data setting is on, the last-printed page data is saved to the controller. Once a print job is completed, the main operation panel can be used to reprint. This is a useful function to print additional copies of the same flyer etc. You can turn the "save data" setting off when printing confidential documents so that the print data does not remain in the memory. |
 |
| The print position can also be adjusted from the main operation panel. You can adjust the position in 0.5mm increments between 0mm to 20mm from the top and bottom, and left and right. You can even make changes after a print job has started, without having to modify any computer settings. The ability to change settings allows the user to continue working efficiently. Once a position has been adjusted, you can check the finished results using a test print. * When printing page data, the adjustment is applied to the sheet that was last printed. |
